
- You are here:
- Home »
- Goalkeeping »
- Plyometric Saves
Plyometric Saves
By Mike Smith –
I was first exposed to plyometrics as a training tool in 2000. Simplified as “ jump training” we used plyo work more as a preventative to ankle, knee and hip injuries. I worked primarily as a junior varsity coach at this time and it was my job to develop the next crop of varsity players mostly from those players who wanted to learn soccer but had never played before and were picking it up late in 8th through 10th grade. This work always involved a couple of goal keeper candidates. All of the players, jv and varsity, went through plyometric exercises every day. At some point, when I was struggling to get a young goalie to quicken her feet, she replied to me “ Ohhhh, like we do in the plyo training?” It actually made a big difference for her, perhaps it will help make a difference for your keeper.
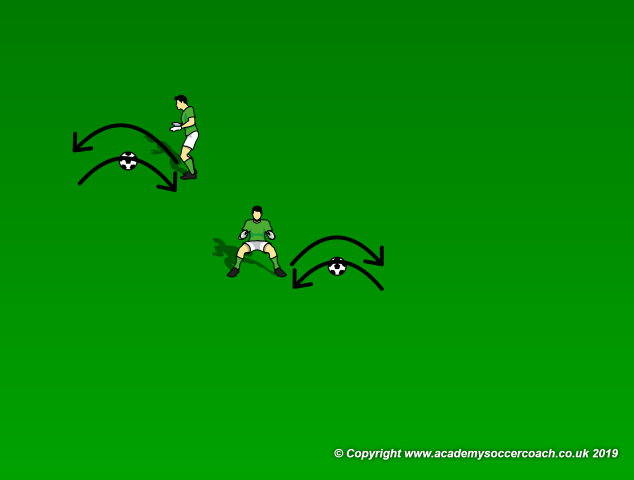
The two plyometric moves ( shown above ) which really help are some of the simplest. From a strictly plyometric stand point, the keeper should always make sure when they land the knees do not come out over the toes and that the legs are straight, meaning the knees should not tilt in ( this is extremely important for female players due to their slightly different hip structure). Keepers should rotate jumping side to side and front to back over a ball focusing on increasing height each time. This can be done for a number of repetitions or seconds in sets of 3 or 5.
There are a couple key factors this type of training helps. When I was going through my D training, the instructor immediately chastened every keeper for leaving their feet too early and going for the “ Hollywood save” as he called it. I have found training by taking an initial jump to the side not only quickens the goalies when immediately leaving their feet ( everyone loves a Hollywood save ) but also helps them react when faking the jump and then going to ground. Likewise, the forward and backward jumps seem to help when making plays going forward or back to the ball during games ( like saving the lob ). Finally, the timing aspect when going for high balls improves when the keepers realize they almost always have time to take a jump before committing to the ball. Here is how to drill it:
Set Up
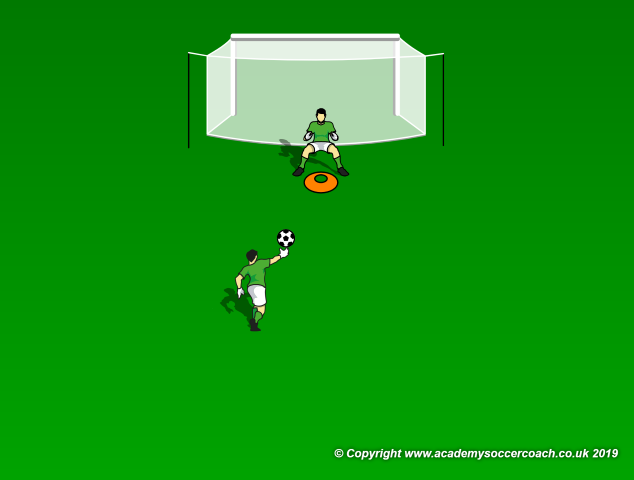
Two keepers can easily work on this. As shown above, a cone takes the place of the ball used in warm ups. IF the keeper starts behind the cone, they must jump to the front before making the save. Obviously, starting in front means there is a jump to the back before making the save. The same holds true with starting on the left or right sides. Initially, the ball can be thrown between knee and chest high for every progression. However, the keepers can start rolling in balls as well as throwing balls higher as the activity continues. Once they have it, bring on the strikers.
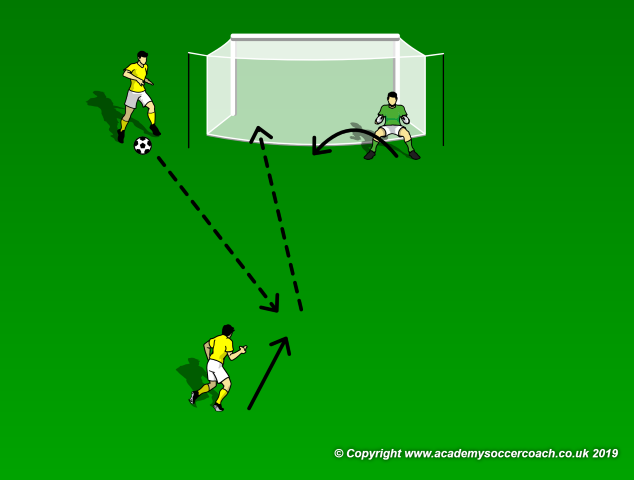
Groups of two strikers step in, the serving striker on a post and the attacking striker 15 – 18 yds out. The ball is served in slightly forward of the shooter, who has two touches including the shot. The keepers rotate between sides on the sideways jumps and between on the line and off for the front and back jumps. There is no cone, but as in both warm ups, the keepers should take a hop before committing to a save.
Coaching Points
The keepers will complain that they miss some saves by hopping and will not readily realize when the hop actually made the save by either increasing their quickness and / or forcing them to read the shot first then commit. The coach should make sure they are making the right read and then as a progression, release the keepers to either hop or not, based on what they see.
By Mike Smith
Currently the Head Coach for University Heights Academy Boys Soccer in Hopkinsville, KY , Mike is in his 14th year as a high school head coach with 23 years coaching experience overall and 34 year as a student and fan of the game. He holds a USSF D License.